Originally, this site all came about from me big chopping my hair back in 2015. Take a look at my transitioning diary where I talk about my experience transitioning before the big chop.
As my hair started to grow, so did I. I’ve decided to incorporate more about myself, from my daily struggles of eating healthy, working out, makeup tips, fashion tips, family etc. I’m going to lay it all out here with you.
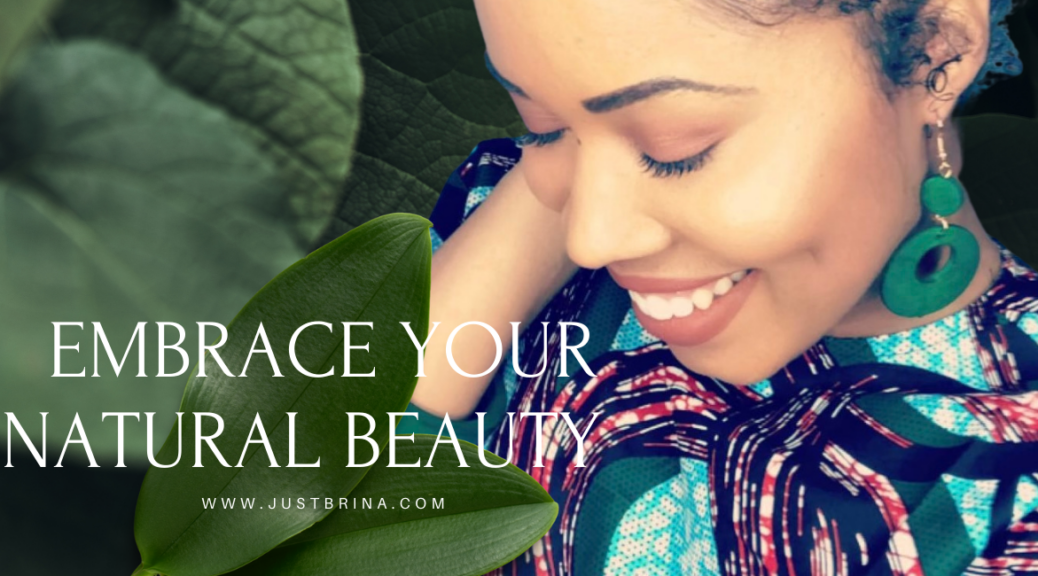
Natural Hair Journey 2015-2020
If you been rocking with me since 2015, you know I have done a lot of revamping to my site and other social media platforms. This time around I plan to be more transparent and consistent with posting content.
If there are any topics you would like for me to discuss, feel free to Direct Message on IG and/or any hair advice join Flourish Hair Group on FB.
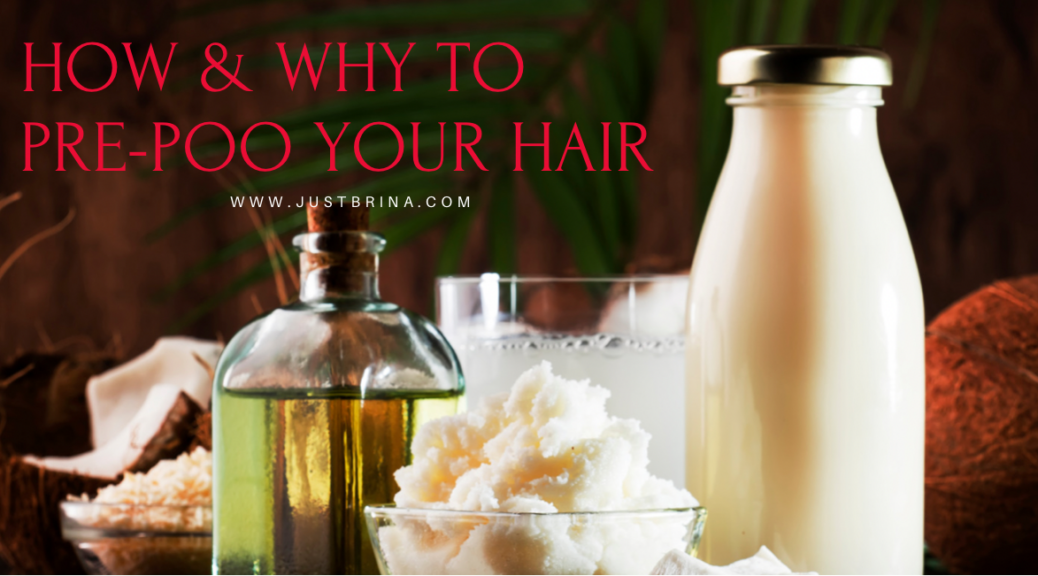
There are lots of pre-made hot oil treatments out there. However, I like to make my own because it’s cheaper in the long run and I can control what goes into it. Pure/raw ingredients give better results.
Hot oil treatments have several benefits to your hair. The most pressing is the restoration of moisture balance. Every day our hair is subjected to lots of external elements such as smog, the headrest in the car, random strangers’ hands…not to mention the styling, dying and other things we do that can dry it out or make it brittle. In addition to restoring moisture, hot oil treatments help with dry scalp and frizz while adding body and shine. (Note: If you have dye in your hair, do not use this treatment within three weeks of a fresh application as the oils will strip and remove a significant amount of your dye. It’s best to do a hot oil treatment the week prior to touching up your color.)
You should consider doing a hot oil treatment at least once every 4-6 weeks, or more often, especially in the winter months, if you feel your hair is often dry to the touch. Why!?! I stress to you again…
The use of hot oil treatments has a conditioning effect on the hair and scalp. This is good news especially for women who have dry hair. Hot oil treatments can help to restore the hair to its best possible condition.
Hot oil treatments are very good news for dry damaged hair. If your hair is chemically treated, you use heat to style it all the time whether its blow dryers, straightening irons etc. or you use hair dyes. A hot oil treatment will infuse moisture and strength to the hair shaft, because it enters the very core of the hair, helping to heal the damage.
If you have frizzy hair or fly away ends, a hot oil treatment will reduce the look of damage. Like magic it can make your otherwise dull hair look shiny, full of body and bounce.
Your scalp loves it! When the scalp absorbs all the delicious goodness from your organic oils it is quite happy to produce healthy hair to reward you for being so kind to it.
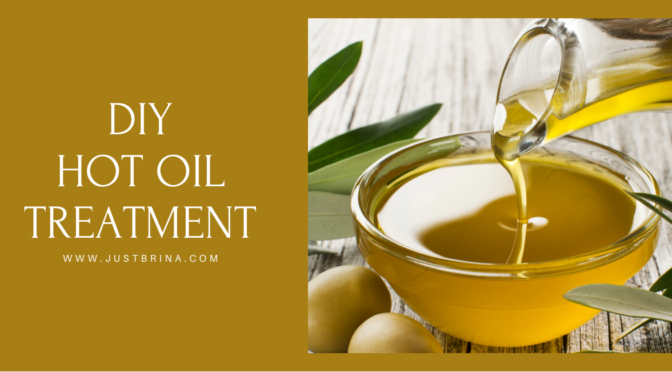
Oils I love to use and why: Coconut oil stands out in the world of black hair care because it is one of the few oils that penetrates the hair instead of just coating the hair strand. It leaves your hair super soft, moisturized a shiny.
Jojoba oil has cleansing and moisturizing properties that benefit the hair. When used as a hot oil treatment, it mimics the natural conditioning of the hair, not only adding moisture but also removing buildup from environmental pollution or from excessive use of hair products.
Extra virgin olive oil treats dandruff and great for general hair conditioning. Being especially prone to dryness, black hair and the scalp need to be kept well hydrated, which olive oil treatments do very well.
Avocado oil penetrates the hair shaft, and gives the hair essential nutrients, vitamins and fatty acids. Also great for treating dandruff.
How to:
Boil water on stove
Combine your oils in a heat safe container (I use a metal bowl), then place inside bowling pot of water.
Pour melted oils into an applicator bottle (this will make it easier to apply to your hair).
Test oil on your finger before applying to your scalp (don’t want to burn yourself).
Distribute oil into your hair evenly using your hands to massage oil from your scalp to ends.
Cover your hair in a plastic cap and process under a hooded dryer for 20 minutes…(Or you can leave on for 30 minutes, overnight etc. If you have a steamer, that works too).
Remove plastic cap and shampoo/co-wash. I prefer to co-wash then rinse using cool water to seal in that moisture.
The #MaximumHydrationMethod is a hair care regimen (typically comprised of five steps) designed to “systematically increase moisture levels in the hair until max hydration is reached.”
If you’re someone with low porosity hair (meaning the hair cuticles are tight and sometimes resistant to soaking up water and moisture), the five-step regimen is said to hydrate, strengthen, and stretch curls while maintaining volume.
Ok, let’s break down exactly how to master the Maximum Hydration Method.
??Step 1: The Cherry Lola Treatment
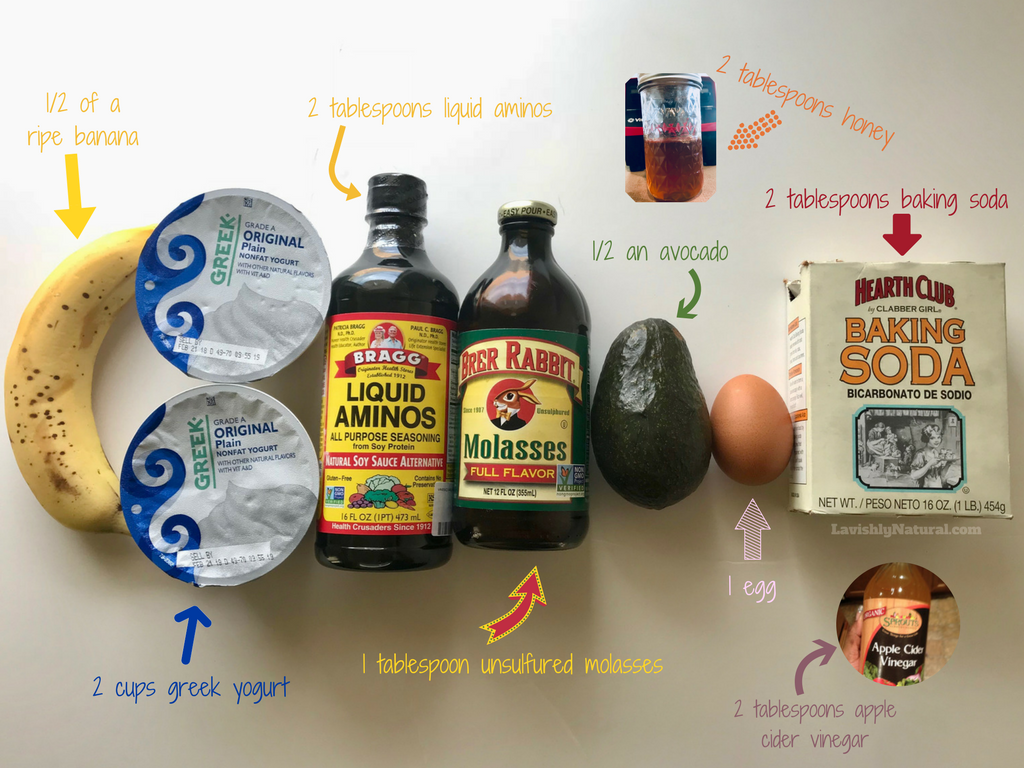
As the first step in the Max Hydration Method, you’ll want to create a mixture that’s known as the Cherry Lola Treatment, which combines a number of ingredients (including greek yogurt, amino acids, and baking soda) to hydrate, reduce frizz, and make hair easier to detangle. Before you get started, you’ll want to take the Cherry Lola ingredients and smooth them in a blender, then pour them into a bowl.
Recipe I used (adjust according to hair length):
2 cups organic plain yogurt
2 tbsp baking soda
2 tbsp organic apple cider vinegar
2 tbsp raw coconut amino acids or regular amino acids
1/2 tbsp raw honey
1 tbsp Unsulfured molasses
1/2 an overripe plantain or banana
3/4 tbsp avocado
1 egg
When your mixture is ready, you’ll apply to clean, dry, detangled hair, saturating it from root to tip. Once each strand is evenly coated, put your hair up into a shower cap. You’ll leave this on for between an hour and a half to two hours and then rinse thoroughly with warm water.
??Step 2: Clarify
You have two options here: You can mix a baking soda rinse or an apple cider vinegar rinse. Both are easy to create.
1. Baking Soda Mix: You’ll mix one and a half tablespoons of baking soda into 1/3 a cup conditioner and let sit on the hair for ten to thirty minutes.
2. Apple Cider Vinegar Mix: You put in a spray bottle with a 1:1 ratio and spray on hair leaving it for thirty minutes to an hour. To skip the mixing, you can also use a pre-made apple cider vinegar rinse. *In the video I did the acv mix
??Step 3: Co-Wash (use protein-free products)
Since some shampoos can strip hair, co-washing cleanses while conditioning which is beneficial to natural hair types. You’ll section the hair and apply your co-wash product from root to tip, apply a shower cap, and steam the hair for twenty minutes, if you don’t have a steamer, sit under dryer or leave on under plastic cap for 30 minutes.
??Step 4: Bentonite Clay Rinse
Depending on your hair’s needs, you can mix the clay with honey and an oil of your choice. Ingredients:
1 cup bentonite clay
1.5 cups of warm water
1 tbsp of honey
1 tbsp of olive oil
Clay masks can be messy in general, so applying it to the hair will likely result in a mess. To ensure you get the benefits, you’ll want to separate the coils as you go and apply the mask in thin layers to prevent the hair from tangling or clumping together. You’ll leave this on for at least 15 minutes. Then rinse with luke warm water.
??Step 5: Apply Styling Products (use protein free products)
Leave-in Conditioner: For this step, you’ll want to do in the shower or under running water to ensure the hair gets all of the water it needs.
Gel or Creme: Now, you’ll apply your creme/gel or both to sections.
Once you’ve applied your styling products of choice, turn your head over and give it a big shake from side to side and up and down to separate your curls without touching them to prevent frizz. Dry as you like and you’re done!