Category Archives: Hair 101

HEY YALL! Welcome to just brina.com!

Originally, this site all came about from me big chopping my hair back in 2015. Take a look at my transitioning diary where I talk about my experience transitioning before the big chop.

As my hair started to grow, so did I. I’ve decided to incorporate more about myself, from my daily struggles of eating healthy, working out, makeup tips, fashion tips, family etc. I’m going to lay it all out here with you.

Natural Hair Journey 2015-2020

If you been rocking with me since 2015, you know I have done a lot of revamping to my site and other social media platforms. This time around I plan to be more transparent and consistent with posting content.

If there are any topics you would like for me to discuss, feel free to Direct Message on IG and/or any hair advice join Flourish Hair Group on FB.

Again, thank you!

IG: https://www.instagram.com/sabrina5681/

Flourish Hair Group: https://www.facebook.com/groups/flourishhairgroup

Embrace your natural beauty sis!

Here are a few tips to steer you in the right direction.

1. Believe that you are beautiful and you will exude beauty. Count your blessings, not your blemishes and always surround yourself with people who remind you of your inner strength and beauty.

2. Embrace your face. Be gentle with your skin and remember to cleanse, moisturise and protect it every day.  Add more veggies and fruit to your diet to help ‘feed’ your face and get plenty of vitamins D and C to help your skin glow. Remember to exfoliate your skin at least once a week, then treat it to a nourishing face mask {preferably while you relax with your feet up}!

3. Love your hair. Work with your hair, not against it. Embrace your texture, find what works for you and stick to that regimen. Treat it regularly (deep conditioning, hot oil treatments etc.) Don’t be a stranger to hair trims and try to keep using styling products and appliances to a minimum.

4. Brush those pearly whites. Of course you already know this..but some of you need to hear it. Brush your teeth at least twice a day, follow with a restorative mouth wash and floss at night before you go to bed. Amidst drinking coffee, eating and the odd glass of wine —rinse your mouth with water when you can. Many foods and beverages contain acids that wear away your tooth enamel over time, which leads to excessive staining. A quick swish of water will whisk away residue and help preserve your smile. Better still, when you can, brush them! And be sure to see your dentist twice a year for checkups and a cleaning. (I need to incorporate this last step myself… I hate the dentist! I know…hate is a strong word..lol)

5. Less is more. Don’t make makeup too obvious. A good tinted moisturizer, mascara, lip gloss, and a touch of blush is all you need for a basic day – and if you want to play up your look for the evening, beat that face girl! lol

To avoid looking ‘too made-up’, try this make-up balancing trick: After applying your make-up, turn away from the mirror and then turn back… remove {or soften} the first thing that stands out and catches your eye – like heavy eyeliner or over-powering lipstick – basically anything that makes your face look off-balanced at first glance.

6. Love your body, but never obsess over it. Find an exercise that you enjoy, one that you can incorporate into your day and do it regularly. Don’t exercise to lose weight or to fight your body shape. Do it to make your body healthy and strong and because it makes you feel good.

7. Sleep well. They say before bedtime avoid watching intense TV shows, paying bills, or engaging in other stimulating activities an hour or two before bedtime but I find that difficult; especially with a demanding schedule. However bathing, dimming the lights, utilizing an Oil Diffuser to assist you in unwinding after a tough day, always works for me. Nothing like some good good sexual activity though. Hey… I’m just sayin’.

8. Be your own guru. Happiness comes from within. If you’re not happy, change it – you and only you, are in charge of your happiness! To speak negative words, you must be thinking them, so think positive. Change your thoughts and change what you say!

Make up your own personal positive mantra which you say each day. Sure you’ll feel funny at first but making a daily pledge is a reminder of your inner strength and gradually words will change the way you think, and feel.

xoxo

Sabrina G.

HOW AND WHY TO PRE-POO YOUR HAIR

Heat exposure, chemical treatments, coloring, and poor grooming techniques can all lead to dry, damaged, or brittle hair. In such situations, shampooing and conditioning might not be enough to revive your locks. You might need to incorporate “pre-pooing” into your routine.

What is it?

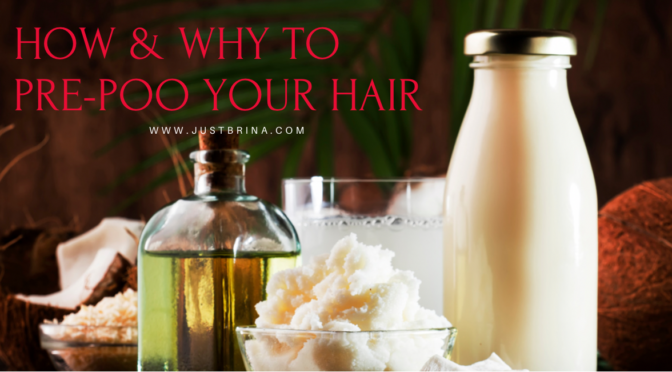
Pre-poo (or pre-shampoo treatment) is when you saturate hair (dry) by applying a moisturizer, oil, hair butter, or a combination of them all and/or other beneficial foods like avocados and honey.

Do you have dry scalp? Pre-pooing is the perfect way to soothe the driest scalp.

Benefits of Pre-pooing

Depending on the length and texture of your hair, shampooing and conditioning can be a workout in itself. Incorporating a pre-shampoo routine might seem like more work — but it’s worth the extra effort.

Pre-pooing is the process of applying a treatment to your hair before the actual shampoo process. The treatment provides your hair with a protective layer. This is helpful because shampooing can strip moisture from the hair. And applying a conditioner after shampooing isn’t always enough to restore lost moisture.

People with certain hair textures might be more familiar with pre-pooing, such as those who have curly or kinky hair. But the truth is, anyone can benefit from pre-shampooing. This treatment can have a restorative effect on dry, tangled, and damaged hair.

Benefits of pre-shampooing include:

  • adds extra moisture to dry locks
  • promotes softer, vibrant hair
  • makes it easier to detangle hair
  • boosts the effectiveness of conditioner, resulting in stronger locks and less breakage

How to Pre-Poo?

The process of pre-shampooing is simple and doesn’t take too much time. Since it occurs before shampooing and conditioning, you’ll apply the pre-poo product to dry hair. This allows the product to coat your strands and lock in moisture before you wet your hair.

Divide and conquer

To make it easier, apply the pre-poo to hair in sections. Divide your hair into four to eight sections depending on length and thickness. This makes it easier to distribute the product evenly over your strands. Coat your hair with the product from roots to ends.

Detangle the tangles

Once you’ve applied the product to each section, use a wide tooth comb to carefully detangle each section.

Soak it in

As a general rule of thumb, leave the pre-poo product on your hair for at least 30 minutes before shampooing. Of course, the longer you pre-poo, the better.

If you prefer, pre-poo earlier in the day, and wash your hair several hours later. Or, do an overnight pre-poo. This involves applying the protective product on your hair at night, wrapping your hair with a scarf, and washing in the morning.

The longer you leave the pre-poo product on your strands, the softer and shinier your hair will be.

Wash, condition, and rinse thoroughly

Once you’ve finished pre-pooing, wash and condition your hair as normal. Be sure to rinse your hair thoroughly to avoid product residue.

Types of Pre-Poo to use?

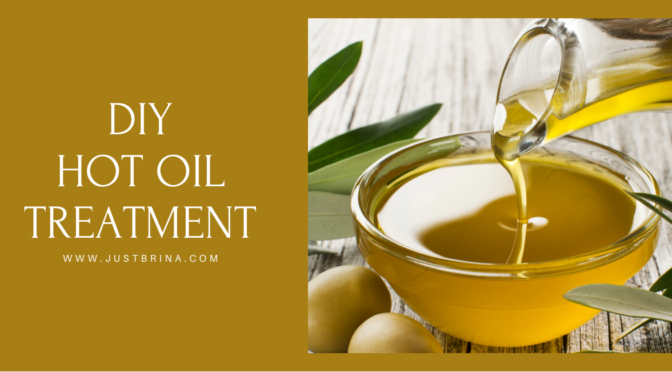
There are no hard and fast rules regarding the type of pre-shampoo product to use. Some people use oils like olive oil, avocado oil, or coconut oil. Others prefer aloe vera, mango butter, and even regular conditioner, either alone or combined with an oil.

Regardless of the product, you can pre-poo as often as needed based on the overall condition of your hair.

Although your choice of pre-poo is based on preference, some products are better for certain hair types. You can pre-poo before every shampoo or once or twice a week.

Pre-poo oils

Pre-pooing with oils is effective if you’re looking to add extra moisture to curly or straight hair.

Oils help repair dryness and damage caused by heat, chemicals, or coloring. And since oils don’t easily rinse away after shampooing, much of the oil will remain on your hair after washing, giving you a huge moisture boost.

Pre-poo oils include:

  • coconut oil
  • avocado oil
  • almond oil
  • argan oil

Pre-poo aloe vera gel

Pre-pooing with aloe vera gel is another option for dry strands since it increases moisture, too. Aloe vera is also helpful if you’re struggling with dandruff. Not only can aloe vera reduce inflammation and itchiness caused by dandruff, its antifungal properties can help prevent dandruff.

Pre-poo butters

Hair butters like shea butter, mango butter, cocoa butter, and hempseed butter help strengthen the hair shaft and prevent hair breakage caused by heat, coloring, or chemical treatments.

These pre-poo products can also rebuild damaged hair follicles, promoting hair growth and fullness. Along with strengthening hair, these butters provide a moisture boost for shinier, softer hair.

DIY pre-poo recipes

You can make your own pre-poo using ingredients in your kitchen. Here are two of our favorites.
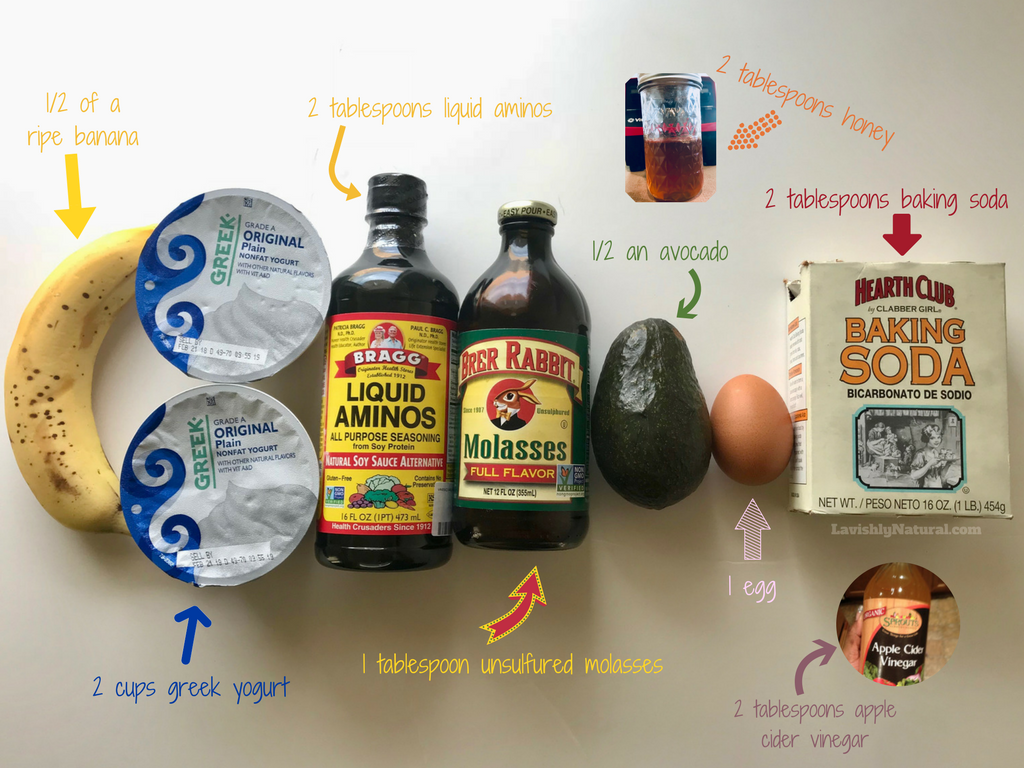
1. Banana pre-poo

Bananas contain potassium, which can stop hair loss. They also contain natural oils to soften and moisturize hair. This pre-poo recipe can help stop frizz, and repair split ends and other hair damage.

Instructions

  1. To get started, mash or blend 1 ripe banana.
  2. Combine the banana with 2 tbsp. of extra-virgin olive oil.
  3. Mix well and apply the banana pre-poo to pre-divided sections of hair.
  4. Allow the pre-poo to sit on your hair for at least 30 minutes before washing and conditioning.
  5. Complete this treatment 1 to 3 times a week.

2. Egg pre-poo

The eggs in this pre-poo recipe can act as a protein treatment to strengthen weak, brittle, or damaged hair. Protein prevents hair breakage, repairs damage, and strengthens strands.

Instructions

  1. To get started, beat 1 to 3 eggs, depending on the length of your hair and how much pre-poo you’ll need to cover it.
  2. Combine the eggs with 1 tbsp. of honey and 2 tbsp. of olive oil.
  3. Section your hair and evenly distribute the mixture over your strands.
  4. Allow the pre-poo to sit on your hair for at least 30 minutes before washing and shampooing.
  5. Complete this treatment at least once a week.

If you don’t have the time to make your own pre-poo concoction, there are a plethora of over-the-counter products you can try.

DIY: Hot Oil Treatment

There are lots of pre-made hot oil treatments out there. However, I like to make my own because it’s cheaper in the long run and I can control what goes into it. Pure/raw ingredients give better results.

Hot oil treatments have several benefits to your hair. The most pressing is the restoration of moisture balance. Every day our hair is subjected to lots of external elements such as smog, the headrest in the car, random strangers’ hands…not to mention the styling, dying and other things we do that can dry it out or make it brittle. In addition to restoring moisture, hot oil treatments help with dry scalp and frizz while adding body and shine. (Note: If you have dye in your hair, do not use this treatment within three weeks of a fresh application as the oils will strip and remove a significant amount of your dye. It’s best to do a hot oil treatment the week prior to touching up your color.)

You should consider doing a hot oil treatment at least once every 4-6 weeks, or more often, especially in the winter months, if you feel your hair is often dry to the touch. Why!?! I stress to you again…

  1. The use of hot oil treatments has a conditioning effect on the hair and scalp. This is good news especially for women who have dry hair. Hot oil treatments can help to restore the hair to its best possible condition.
  2. Hot oil treatments are very good news for dry damaged hair. If your hair is chemically treated, you use heat to style it all the time whether its blow dryers, straightening irons etc. or you use hair dyes. A hot oil treatment will infuse moisture and strength to the hair shaft, because it enters the very core of the hair, helping to heal the damage.
  3. If you have frizzy hair or fly away ends, a hot oil treatment will reduce the look of damage. Like magic it can make your otherwise dull hair look shiny, full of body and bounce.
  4. Your scalp loves it! When the scalp absorbs all the delicious goodness from your organic oils it is quite happy to produce healthy hair to reward you for being so kind to it.

Oils I love to use and why:
Coconut oil stands out in the world of black hair care because it is one of the few oils that penetrates the hair instead of just coating the hair strand. It leaves your hair super soft, moisturized a shiny.

Jojoba oil has cleansing and moisturizing properties that benefit the hair. When used as a hot oil treatment, it mimics the natural conditioning of the hair, not only adding moisture but also removing buildup from environmental pollution or from excessive use of hair products.

Extra virgin olive oil treats dandruff and great for general hair conditioning. Being especially prone to dryness, black hair and the scalp need to be kept well hydrated, which olive oil treatments do very well.

Avocado oil penetrates the hair shaft, and gives the hair essential nutrients, vitamins and fatty acids. Also great for treating dandruff.

How to:

  1. Boil water on stove
  2. Combine your oils in a heat safe container (I use a metal bowl), then place inside bowling pot of water.
  3. Pour melted oils into an applicator bottle (this will make it easier to apply to your hair).
  4. Test oil on your finger before applying to your scalp (don’t want to burn yourself).
  5. Distribute oil into your hair evenly using your hands to massage oil from your scalp to ends.
  6. Cover your hair in a plastic cap and process under a hooded dryer for 20 minutes…(Or you can leave on for 30 minutes, overnight etc. If you have a steamer, that works too).
  7. Remove plastic cap and shampoo/co-wash. I prefer to co-wash then rinse using cool water to seal in that moisture.

Maximum Hydration Method

You ask? What Is The Maximum Hydration Method?

The #MaximumHydrationMethod is a hair care regimen (typically comprised of five steps) designed to “systematically increase moisture levels in the hair until max hydration is reached.”

If you’re someone with low porosity hair (meaning the hair cuticles are tight and sometimes resistant to soaking up water and moisture), the five-step regimen is said to hydrate, strengthen, and stretch curls while maintaining volume.

Ok, let’s break down exactly how to master the Maximum Hydration Method.

??Step 1: The Cherry Lola Treatment

As the first step in the Max Hydration Method, you’ll want to create a mixture that’s known as the Cherry Lola Treatment, which combines a number of ingredients (including greek yogurt, amino acids, and baking soda) to hydrate, reduce frizz, and make hair easier to detangle. Before you get started, you’ll want to take the Cherry Lola ingredients and smooth them in a blender, then pour them into a bowl.

Recipe I used (adjust according to hair length):

  • 2 cups organic plain yogurt
  • 2 tbsp baking soda
  • 2 tbsp organic apple cider vinegar
  • 2 tbsp raw coconut amino acids or regular amino acids
  • 1/2 tbsp raw honey
  • 1 tbsp Unsulfured molasses
  • 1/2 an overripe plantain or banana
  • 3/4 tbsp avocado
  • 1 egg

When your mixture is ready, you’ll apply to clean, dry, detangled hair, saturating it from root to tip. Once each strand is evenly coated, put your hair up into a shower cap. You’ll leave this on for between an hour and a half to two hours and then rinse thoroughly with warm water.

??Step 2: Clarify

You have two options here: You can mix a baking soda rinse or an apple cider vinegar rinse. Both are easy to create.

  1. 1. Baking Soda Mix: You’ll mix one and a half tablespoons of baking soda into 1/3 a cup conditioner and let sit on the hair for ten to thirty minutes.
  2. 2. Apple Cider Vinegar Mix: You put in a spray bottle with a 1:1 ratio and spray on hair leaving it for thirty minutes to an hour. To skip the mixing, you can also use a pre-made apple cider vinegar rinse. *In the video I did the acv mix

??Step 3: Co-Wash (use protein-free products)

Since some shampoos can strip hair, co-washing cleanses while conditioning which is beneficial to natural hair types. You’ll section the hair and apply your co-wash product from root to tip, apply a shower cap, and steam the hair for twenty minutes, if you don’t have a steamer, sit under dryer or leave on under plastic cap for 30 minutes.

??Step 4: Bentonite Clay Rinse

Depending on your hair’s needs, you can mix the clay with honey and an oil of your choice. Ingredients:

  • 1 cup bentonite clay
  • 1.5 cups of warm water
  • 1 tbsp of honey
  • 1 tbsp of olive oil

Clay masks can be messy in general, so applying it to the hair will likely result in a mess. To ensure you get the benefits, you’ll want to separate the coils as you go and apply the mask in thin layers to prevent the hair from tangling or clumping together. You’ll leave this on for at least 15 minutes. Then rinse with luke warm water.

??Step 5: Apply Styling Products (use protein free products)

Leave-in Conditioner: For this step, you’ll want to do in the shower or under running water to ensure the hair gets all of the water it needs.

Gel or Creme: Now, you’ll apply your creme/gel or both to sections.

Once you’ve applied your styling products of choice, turn your head over and give it a big shake from side to side and up and down to separate your curls without touching them to prevent frizz. Dry as you like and you’re done!

See my results here:

YouTube: Just BRINA